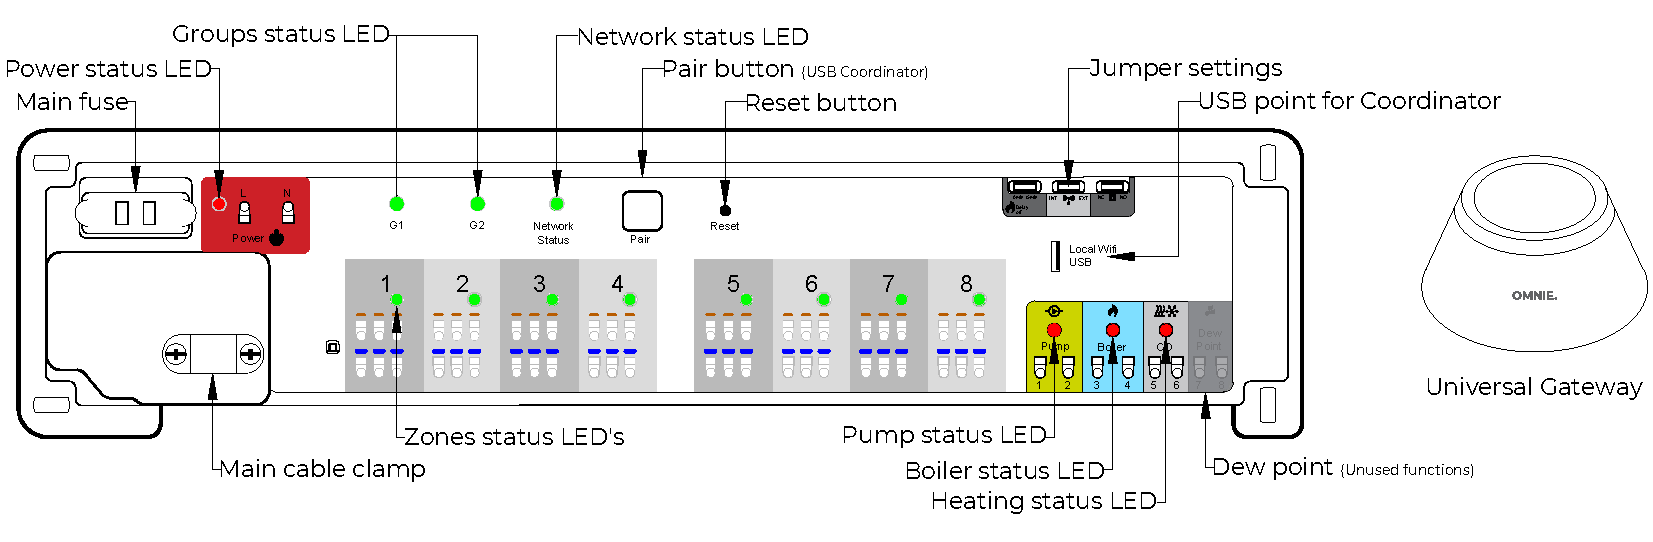
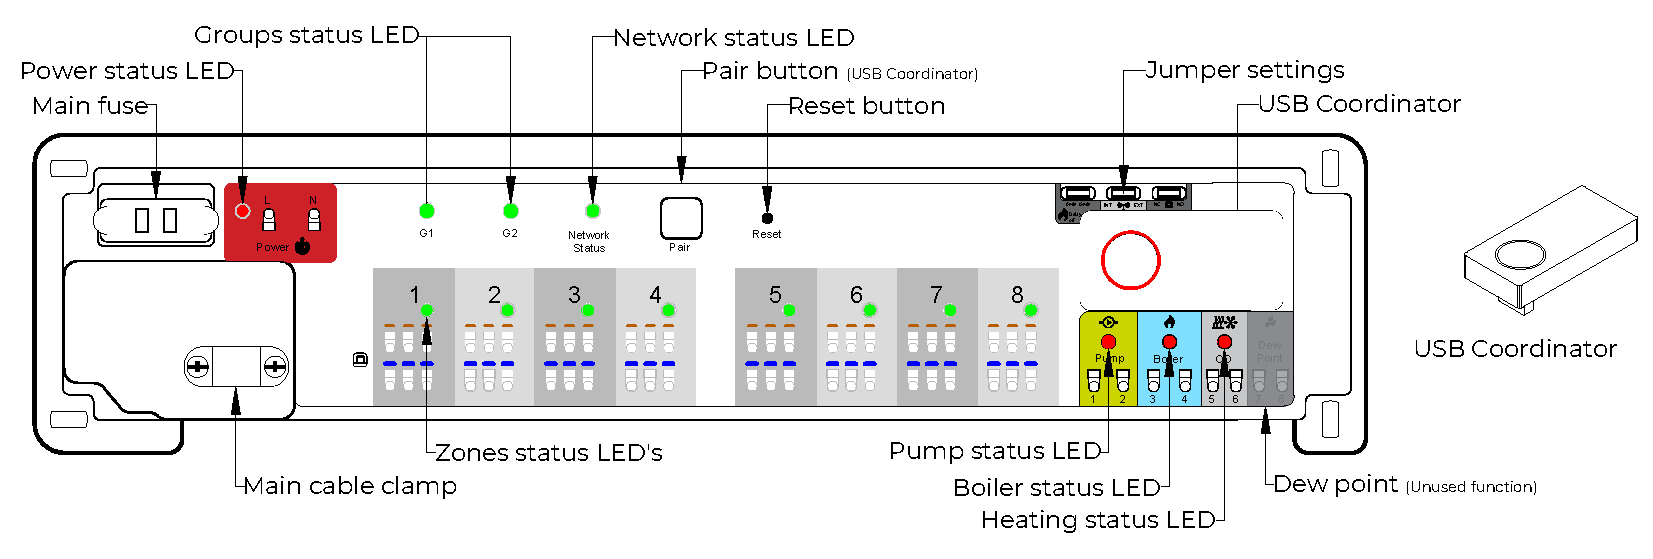
- On powering up the Wiring Centre, actuator LED’s will light up green then go off, then the Network Status LED flashes green.
- Remove the coordinator from the Wiring Centre, access the OMNIE Home App and add your Wiring Centre. When in Pairing Mode, the Universal Gateway will start flashing red. The Network Status LED on the Wiring Centre goes steady green when connected.
- Repeat the process for every Wiring Centre in the system. Note: One Universal Gateway can support up to 100 devices (thermostats, TRV’s, etc.).
- To identify your Wiring Centre (WC) number press Pair for one second. The LED on the zone number lights green: WC -1=Zone 1, WC-3=Zone 1, 2, 3, and so on. The Network Status LED is used to identify WC-9.
- To pair your OMNIE thermostats, see your thermostat manual.
- The Universal Gateway will turn solid blue automatically, once the pairing process is complete.
Note: To restore the Wiring Centre back to factory default settings at any time, press and hold the pair button on the Wiring Centre for 15 seconds. The G1 and G2 LEDs turn from flashing red to solid red then go off. After that please press the Reset button once.
|